Best Way to Decorate a Frosted Christmas Tree

I have loved decorating Christmas trees for as long as I can remember. If I could have a fun little dream job, it would be decorating Christmas trees professionally!
Decorating Christmas trees is something that I have struggled with in the past. It wasn't something that just came naturally to me, even though I loved to do it. Over the years, I have picked up little tips and tricks here and there and I finally feel a little more confident. I hope some of my tips will help you to decorate your tree too! There were so many questions this year about my trees that I had to split it into 2 posts. This post will cover the basic steps (as well as sources for my decor) for decorating a beautiful tree! You can see the other post (HERE) for 10 tips for arranging beautiful ribbon on your Christmas tree.
UPDATE: I made a couple of how-to videos HERE showing step-by-step my process for setting up, decorating, and adding ribbon to artificial Christmas trees. You can also see my tutorial for How to Flock a Christmas Tree HERE.
The order that you decorate your tree can make the biggest difference in the world! Ribbon has its own sets of tips and tricks, so I decided to do a separate post with those tips- you can see that post HERE.
Before we dig in, please keep in mind that these trees have taken me YEARS to collect and work on. It is hard to find those big mercury glass ornaments, for instance, so I have just collected them as I have found/could afford them. If you can't find everything you are looking for, or don't have the budget you would like to, be creative! I used (free) paper snowflakes on my tinsel tree for the past two years because I still haven't figured out how I want to decorate that one, and it really hasn't been in the budget.
I will be going through each tree individually, so if there was one that you had your eye on, you can go right to that one below!

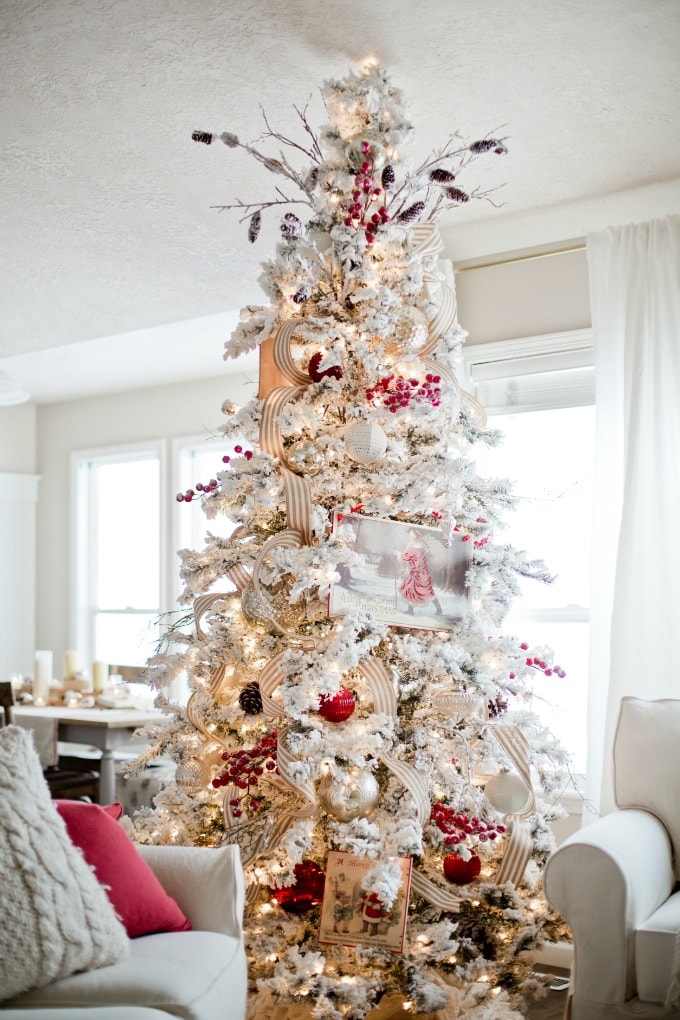
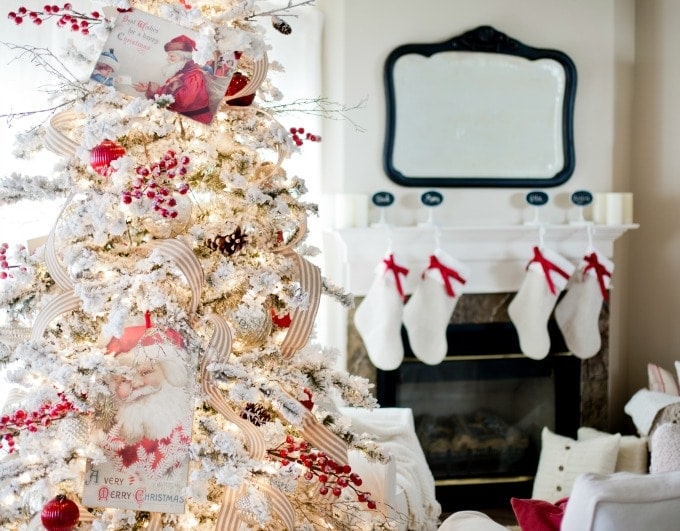
For my main big flocked tree, I used:
- 9 ft flocked Christmas tree (Tai Pan. I adore this tree! My last tree was a regular tree from Walmart that I had flocked by a local nursery, and it didn't seem to be as strong as the flocking on this guy) You can see how to flock a Christmas tree (the real way) HERE.
- Twig picks, frosted berry picks, pinecone picks (Michaels)
- Big wooden vintage postcard signs (Gordmans, Homegoods)
- Large, medium, and small Mercury Glass and other glass ornaments. Mostly silver and light gold, with a few red and white ones as well. (Homegoods, Marshalls, Tai Pan)
- Frosted pinecones (I frosted them-free)
- Striped Burlap Ribbon (Craft Warehouse- about 3, 10ft spools, similar HERE)
- Vintage blanket for a tree skirt (I haven't found/made a tree skirt yet for it)
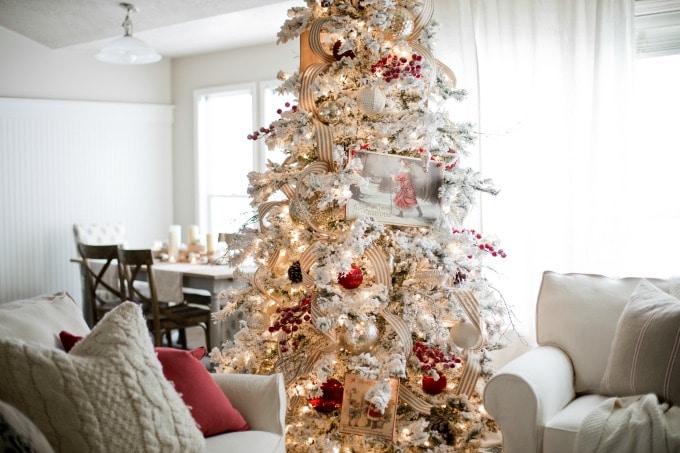
For this tree, I decorated in this order:
- Picks and berries- scattered throughout the tree, going in the direction of the branches. Extra ones at the top of the tree arching upward to balance out the bottom of the tree.
- Big wooden vintage pictures- scattered evenly throughout. I got them to stay in the tree by picking spots where the branches were already a little more sparse and sticking them deep into the tree, bending branches around the edges to hold them in.

- Big glass ornaments, half of the smaller glass ornaments- The trick to making your tree look lush, without being weighted down is to layer your ornaments, sticking some way in toward the trunk. It creates a lot of visual interest instead of just having everything hanging on the outside, which can almost feel like it is just an outer shell.
- Ribbon- (to see my ribbon tricks, click HERE) I cut my ribbon into approximately 6 to 8 foot pieces and looped them in and out of the tree vertically, bending instead of weaving. Instead of bouncing it perfectly straight the entire length of the tree, I bounced it a little more haphazardly which really creates a nice flow and interest.
- The remaining smaller ornaments and pinecones- I saved the ornaments that are hanging on the outermost edges of the branches until after the ribbon.
![]()
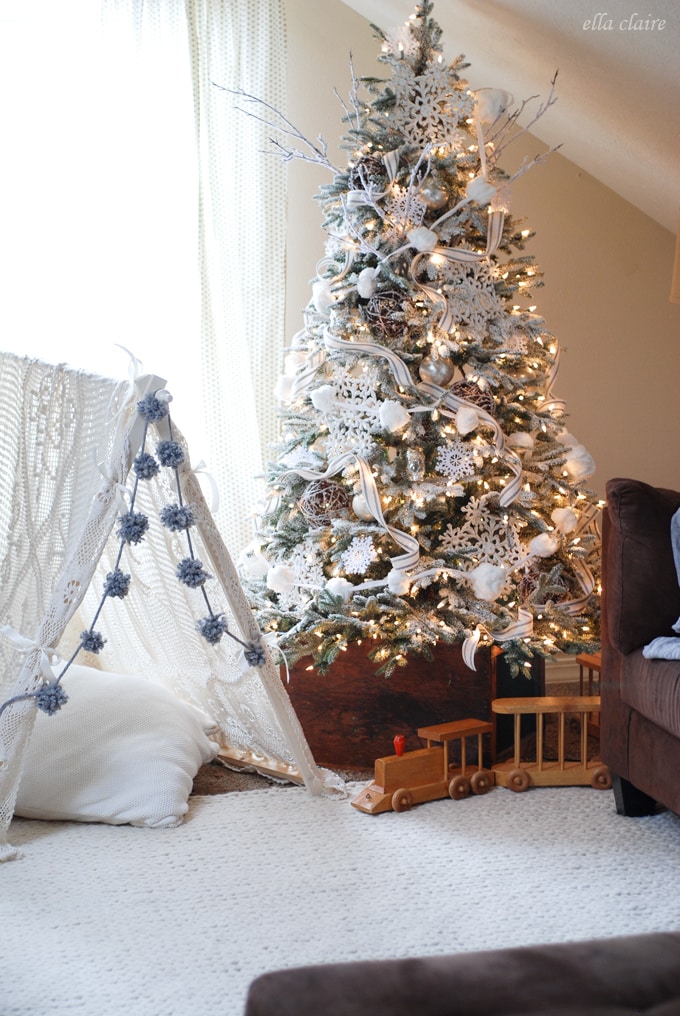
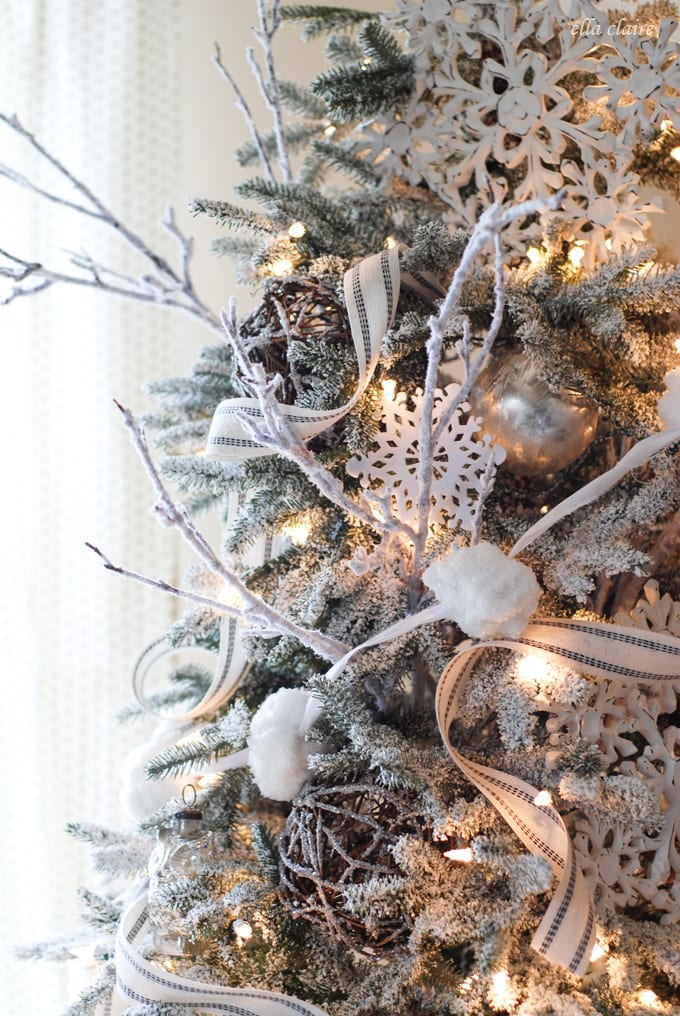
For the winter wonderland Family Room tree:
- 6 1/2 ft. Frosted Frasier Fir (Balsam Hill)
- Frosted Twigs (Michaels)
- Twig balls, Big distressed white wooden snowflakes, small foam snowflakes, mercury glass owls (Tai Pan)
- Mercury glass ornaments (Walmart- LONG time ago)
- Snowball garland (homemade- tutorial coming)
- Ribbon (Michaels or similar HERE)
- Antique wood box (Stole from my mom. Sorry mom :))
For this tree, I decorated in this order:
- Frosted sticks- arching upward at the top of the tree to balance out the width of the base of the tree.
- Big wooden snowflakes- setting them deeper into the branches, adding a huge amount of dimension and interest to the tree.
- Twig balls- scattered evenly throughout the tree, also tucking nicely deep into the branches.
- Snowball garland- hung in a sort of S shape.
- Ornaments- filling in the holes, layering more on the outside of the branches than the twig balls and large snowflakes.
- Ribbon- (to see my ribbon tricks, click HERE)
- Small foam snowflakes- I scattered these here and there, filling in any holes.
![]()
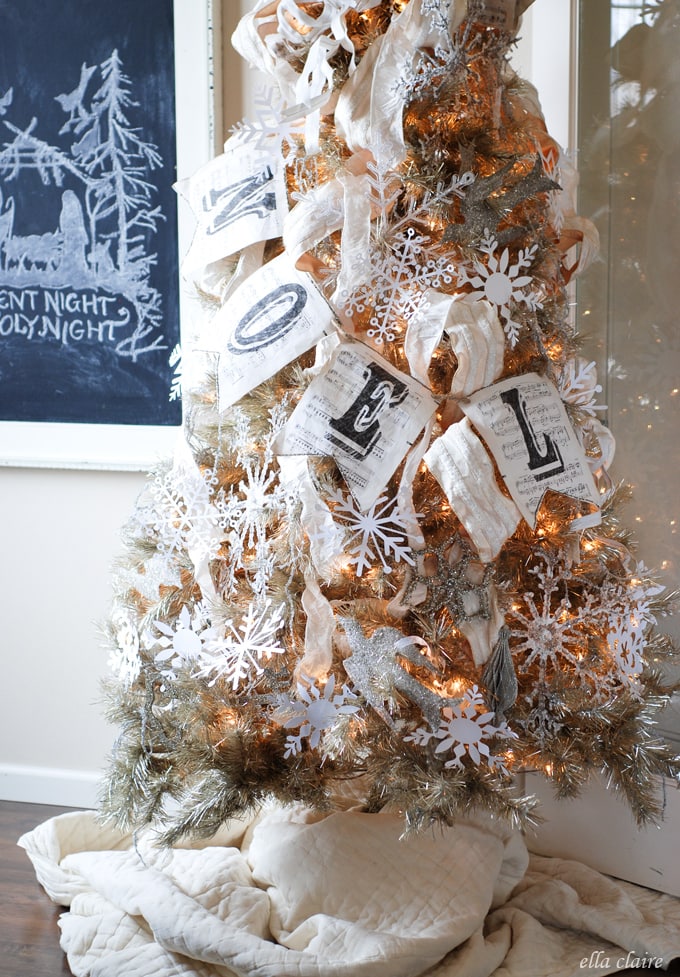
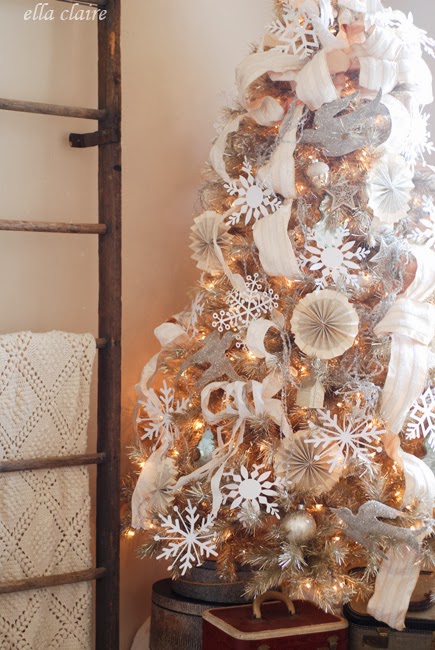
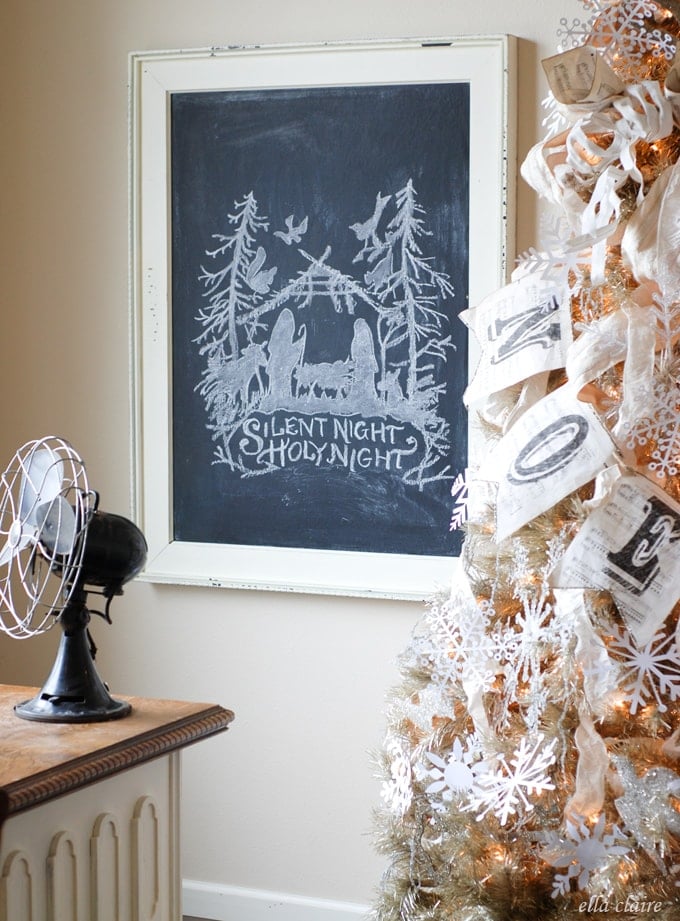
and here is the tinsel tree from last year:
I actually liked it better last year, but I had already thrown away the bookpage pinwheels and I didn't have a chance to make new ones!
For the tinsel tree:
- 7 ft tinsel tree (Walmart, 6 years ago)
- Plastic snowflakes (dollar store, glittered by me)
- German Glass Glitter doves (made by me)
- Various ornaments (gifts, Tai Pan, target- all old)
- Noel Banner (made by me)
- Paper snowflakes (made by me, using computer paper and a silhouette machine)
- Ribbons (Tai Pan)
- Rolled up sheet music
- Blanket for tree skirt
For this tree, I decorated in this order:
- Big plastic and glitter snowflakes- stuck into the branches deeply, and generally straight up and down
- Noel Banner- draped across the front.
- Ribbon- Starting from the top and cascading, bouncing in and out downward (More details HERE)
- German glass glitter doves- alternating as if they are elegantly flying
- Ornaments- hung in open spots
- Paper snowflakes- stuck in open spots
- Rolled up paper sheet music stuck here and there to add volume to the top.
For this tree, the ribbon is the most expensive part. Everything else is either handmade, a leftover from my stash, or free. The way that I folded and draped the ribbon was by making loopy bows and having the tails cascade downward. I saw a tutorial on a blog that I love (HERE) and made a mental note to share it with you since it is the way I did mine too. Please note: If the ribbon is the main base of your tree, like Heidi's is, be sure to put it on first!

- Please note: I haven't used a real tree in a really long time, so most of these tips are for artificial trees.
- If you are trying to decide where to put your money, my recommendation is to invest in a tree that you will love. I (obviously) LOVE LOVE LOVE flocked trees, and to me, it is worth the investment. I find that a really gorgeous tree is pretty all by itself and really doesn't need a ton of decoration. So, if you have to choose, invest in your favorite tree first, and add decorations and ornaments next year.
- Things don't have to be super expensive to be beautiful. I actually love the look of the foam snowflakes on my bonus room tree, and the paper snowflakes on the tinsel tree.
- Buy your tree on black friday, when holiday coupons first come out, or after Christmas to get the best deal. I purchased my flocked tree this year with a 25% off coupon, but I have seen them in the past after Christmas for 50-75% off as well. My tinsel tree was one that I bought at Walmart after Christmas for 85% off since it was a floor model.
- Be patient. As someone who struggles with patience, I know how hard this one can be. But, you won't regret holding out for what you really want, or for things when they are within your budget. Sometimes it takes a while to find what you are really looking for, and that's ok!
- Invest in good quality storage for your trees. You want them to last a long time. We use heavy duty storage bags.
- Again, to see all of the ribbon tips, you can visit the post HERE.
- If you want your ribbon to be a little more perfect, be sure to get the wired kind. If you want it to be more flowy and organic (like the ribbon on my winter wonderland tree) then you don't need wire. Just keep in mind that they do have different looks.
- If you want to go trendy, keep your ornament collection classic and get trendy with the ribbon. It is easier to replace ribbon every few years than it is to replace everything!
Whew that was a lot! Are you still with me? If I think of anything else, I will add it to this post. Above all else, be kind to yourself. Your work will never look like anyone else's, and that is GREAT! You do beautiful work, and you should be proud of the work you do for your family!
Next year, my hubby and I plan on starting a tradition where we add a live tree specifically for the littles to decorate with their sweet handmade ornaments, popcorn garlands, etc. and I am very excited about that!

I hope that helps! Be sure to tag me on Instagram so I can see your beautiful trees! I am obviously a little obsessed with them.
Save Save
As an Amazon Associate I earn from qualifying purchases.
Best Way to Decorate a Frosted Christmas Tree
Source: https://www.ellaclaireinspired.com/how-to-decorate-a-christmas-tree/
0 Response to "Best Way to Decorate a Frosted Christmas Tree"
Post a Comment